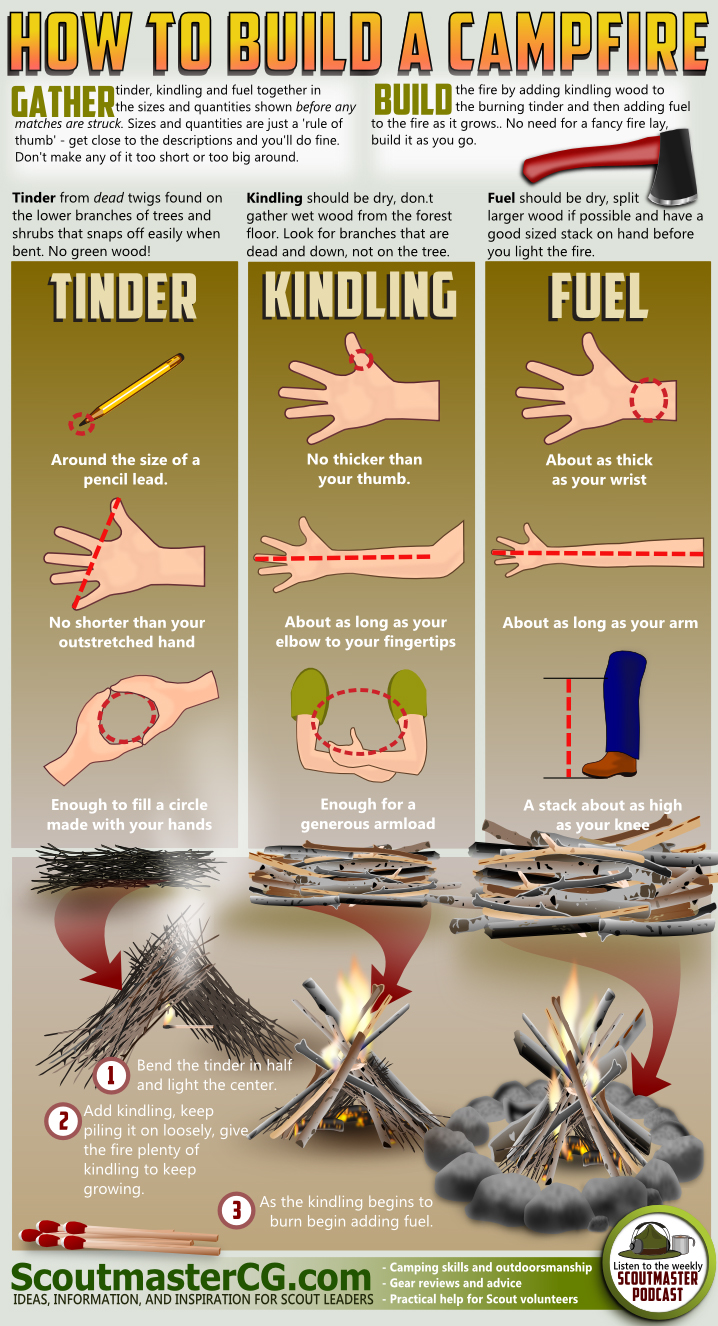
We found this infographic on Pinterest, created by the amazing ScoutmasterCG it details the basics for creating a fire.
Step 1 - Gather
The first step of building a fire is to gather your fuel, theres on point in lighting the fire when you don’t have sufficent fuel close to hand to keep it going. As the image shows you want to split your wood into Tinder, Kindling and Fuel.
Tinder - Tinder is really thin wood, about the width of a pencil led and the length of a pencil too.
Kindling - Kindling should be no thicker than your thumb and roughly the length of your elbow to your thumb. As always you want to avoid wet wood, and look for dead wood on the ground, nothing on the tree!
Fuel - This is what’s going to keep the fire burning, it should be about as thick as your wrist and as long as your arm, as always it should be dry.
Step 2 - Build and Light
Scoutmaster CG says there’s nothing fancy about lighting a fire, start with the tinder, bend it into an arch shape and light it in the centre. As the tinder burns start to add the kindling on to it, then once this is burning you can add the fuel. Keep a supply of fuel to one side so that you can keep adding it to the fire as need be.
How to build a fire is just one of many great Scouting guides and outdoors tips from Scoutmaster CG, there is even a regular podcast discussing Scout Leader ideas and guides.


